

How To Install Ssl Wordpress
If y'all are running an ecommerce site, accepting credit cards, or passing information that needs to be encrypted, you'll need to install an SSL certificate on your WordPress site. Having an SSL document volition allow you to enable HTTPS, which ensures that no data is passed in plain text. In fact, nosotros recommend all sites utilize HTTPS, every bit it has a lot of boosted benefits beyond security.
Follow the steps below on how to install a new SSL certificate for your WordPress site on Kinsta.
Note: If you lot have an existing SSL certificate yous'd similar to transfer over, check out our guide on how to transfer an existing SSL document.
Adopt to sentinel the video version?
Choice 1 – Free Cloudflare SSL
On Kinsta, all verified domains are automatically protected by our Cloudflare integration, which includes gratis SSL certificates with wildcard support. This means that unless yous have a specific reason to add a custom SSL, you won't have to worry almost manually configuring an SSL on Kinsta.
Option 2 – Install Custom SSL Certificate
For users who adopt to go the custom SSL route, MyKinsta supports custom SSL certificates as well. However, we only back up custom SSL certificates that include wildcard domain support at this time. If your custom SSL doesn't support wildcard domains, we recommend using our free Cloudflare SSL or purchasing a custom SSL that covers wildcard domains as well.
Step ane – Buy SSL Certificate
Purchase your SSL certificate from whatever vendor you like, such as Comodo, DigiCert, GeoTrust, Thawte, or Trustwave. Kinsta supports all types of SSL certificates, as long equally they include wildcard domain support.
Step 2 – Server Blazon
When purchasing a new SSL certificate, you lot are asked to provide the server type. The type of our spider web server is Nginx. If that pick is not available, then "Apache" or "Other" will work as well.
Footstep 3 – Generate CSR and Private Central
A CSR (Certificate Signing Request) will be needed past the SSL provider to create/sign the document file. For generating a CSR and RSA cardinal (together known every bit a key pair), please consummate this form: Online CSR and Key Generator.
We recommend filling out every field, simply at a minimum, yous should fill up in the following, equally seen in the case below:
- Common name (domain name)
- E-mail Accost
- Arrangement
- Urban center / Locality
- State / County / Region
- State
Note: For the mutual name field, if you're generating a wildcard certificate, y'all'll need to input your domain name like *.domain.com.

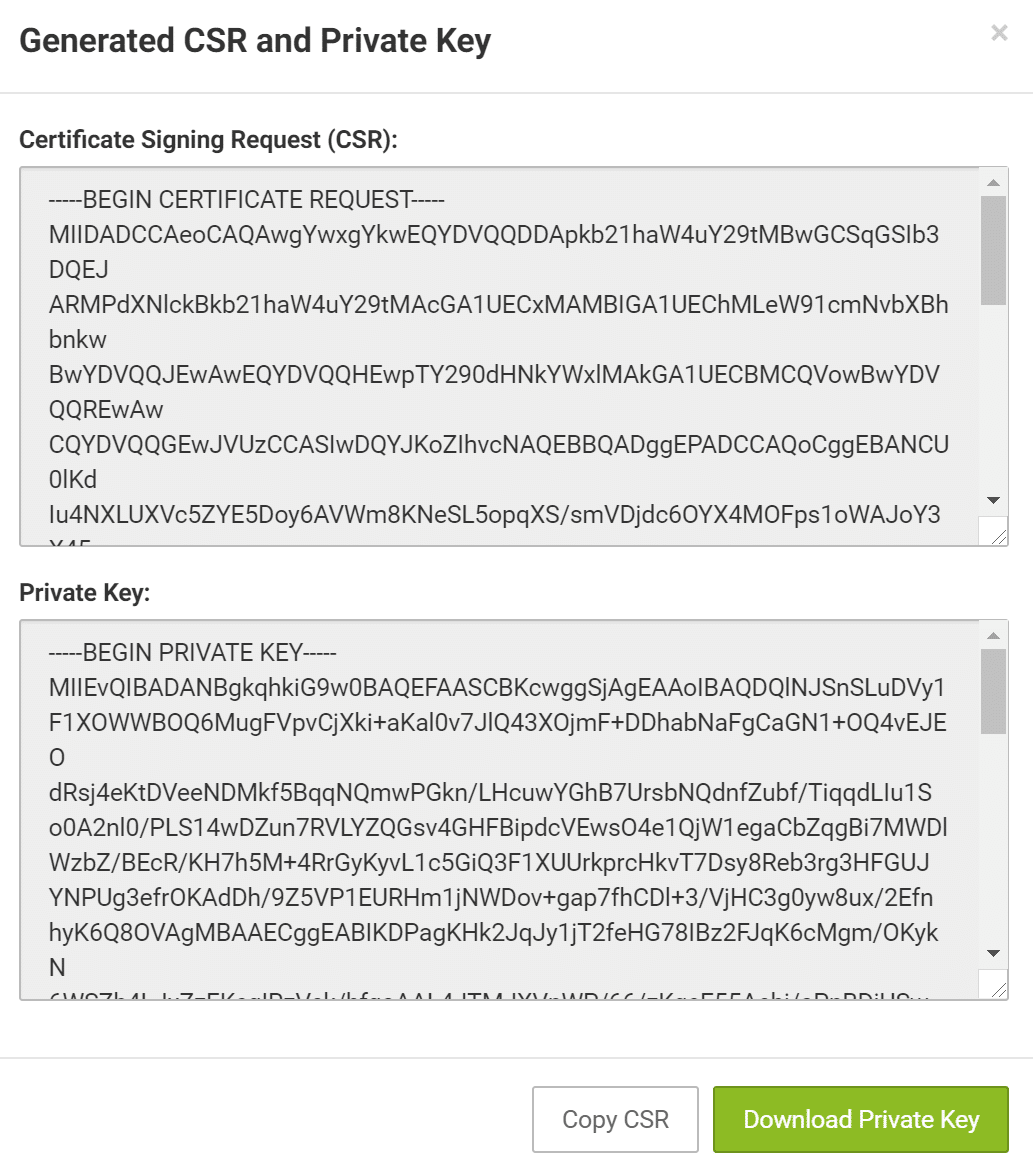
The form will generate the private key file and the CSR. Salvage both of those, as the certificate will be unusable without them.
Stride iv
Upload your CSR with your SSL provider to regenerate your SSL certificate (.cert).
Pace 5
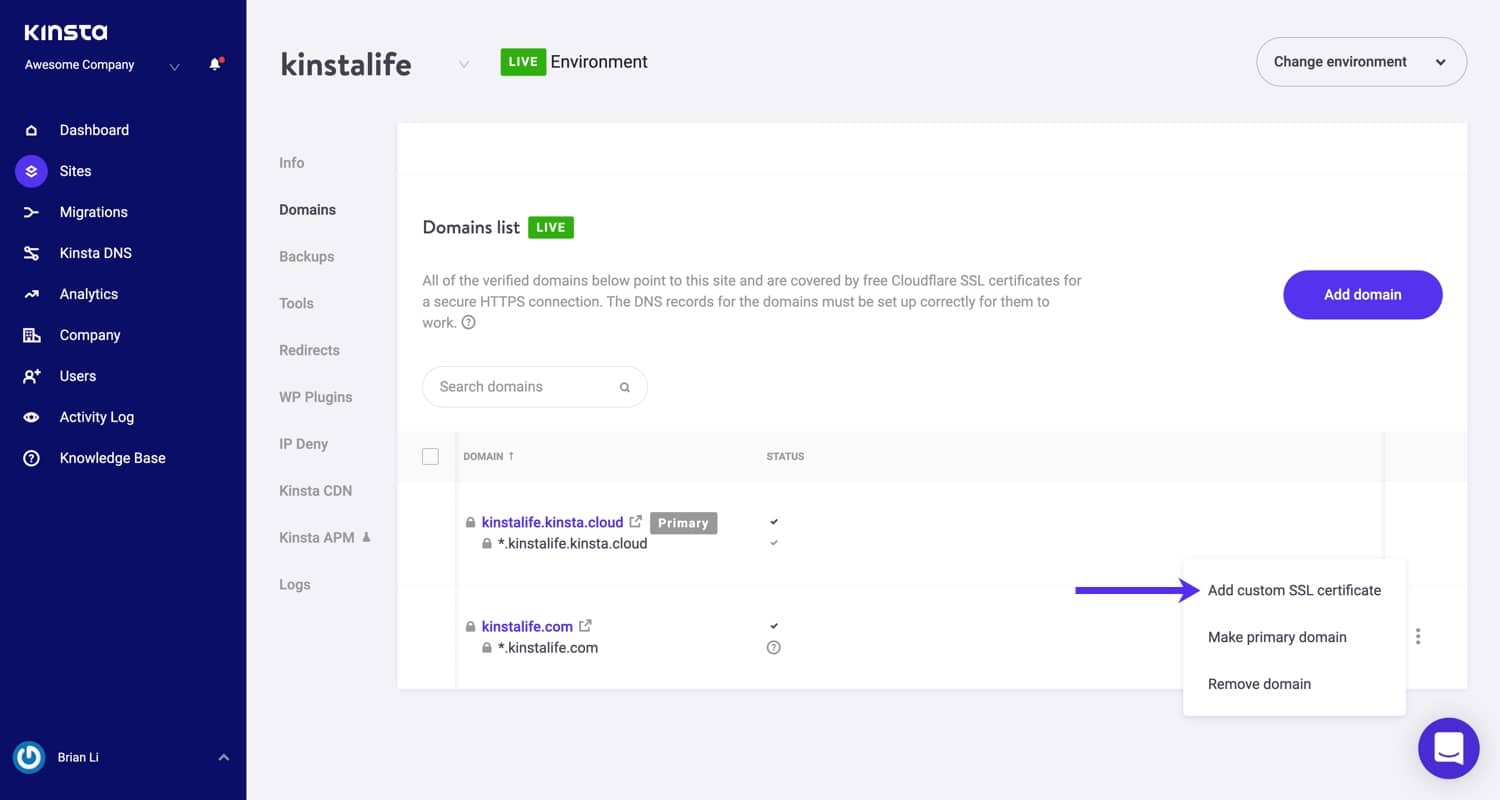
In MyKinsta, navigate to Sites > sitename > Domains. Click on the dropdown menu next to the domain you desire to add a custom SSL certificate for and click Add Custom SSL Certificate.
Stride half-dozen
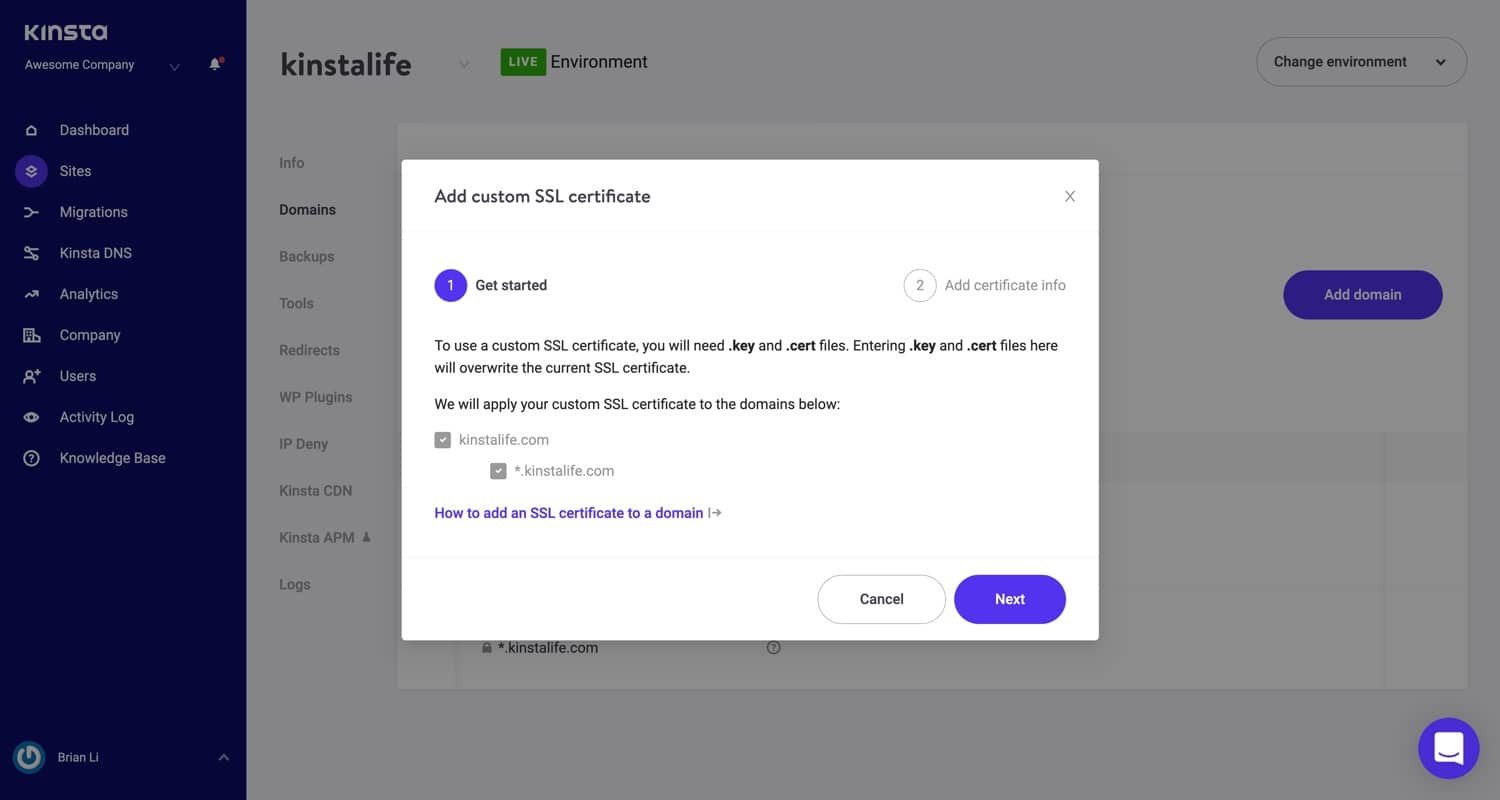
Next, y'all'll see a confirmation modal showing the domains that the custom SSL will cover. Click the Next push button to proceed to the adjacent footstep.
Step vii
Y'all volition so be able to add together your private key (.central) and certificate (.cert, .cer., or .crt file). Most SSL providers will email you a .crt or .cer file and a .ca-bundle file. You can apply a text editor like Notepad++ or TextMate to open the certificate and package files.
Paste the contents of your .crt file in the .cert file contents section first and then the contents of the .ca-bundle file below it.

Note: If yous don't have your intermediate certificates, y'all can use a free tool similar What's My Chain Cert or Certificate Concatenation Composer to generate the certificate concatenation. Re-create and paste this certificate chain (which includes your intermediate certificates) in the .cert file contents section.
Click the Add Certificate button to finalize the configuration procedure.
How to Bank check Your SSL Document
After you have installed your SSL document, we recommend running an SSL check to verify that everything is set up correctly. An invalid SSL certificate can cause your visitors to be faced with the "your connection is not individual" mistake.
How to Renew Your SSL Document
An SSL certificate doesn't last forever, so it will need to be renewed before it expires. If you lot're not sure if your site is using our free Cloudflare SSL certificate or a custom SSL document, there are a couple of ways you lot can check to encounter who the issuer is. If the issuer proper name is anything other than Cloudflare, your site is using a custom SSL certificate.
To check the issuer proper noun, view the certificate in your browser and look for the Arrangement in the Issuer Name section, or apply a tool like SSLShopper's SSL Checker and view the Issuer data.

Free Cloudflare SSL Certificates
If y'all're using our gratuitous Cloudflare SSL certificate and using Kinsta DNS for your site, the renewal process is automatically handled by Cloudflare. If you lot're non using Kinsta DNS, y'all'll demand to add together a TXT record to your domain for the renewal. For more details, see our guide on Free SSL Renewals.
Custom SSL Certificates
If you have a custom SSL document, you lot'll need to renew it with the SSL provider or domain registrar from which it was purchased. In one case your SSL is renewed, you'll need to re-upload information technology in MyKinsta.
How to Force HTTPS
Afterwards installing an SSL certificate, you'll take the choice to force HTTPS in MyKinsta. This feature allows you to automatically forward all incoming requests to HTTPS.

Our force HTTPS tool gives yous ii options – Forcefulness all traffic to the primary domain and Employ requested domain. For normal WordPress sites, nosotros recommend using the offset option, which volition force a 301 redirect to the HTTPS version of your canonical domain. The second option is useful for WordPress multisite, which may have multiple domains assigned to the same site.

Summary
At Kinsta, we support both free Cloudflare SSL certificates and custom SSLs. For most users, our Cloudflare SSL integration provides HTTPS support at no additional cost. Still, if yous have a specific use case that requires a custom SSL, we support that as well. If yous have whatever questions virtually how to add an SSL document to your site, achieve out to our 24/7 Support team!

Source: https://kinsta.com/help/how-to-install-ssl-certificate/
Posted by: bakerpludenis.blogspot.com
0 Response to "How To Install Ssl Wordpress"
Post a Comment